Import 3D cross sections from QGIS to HEC RAS
In the HEC RAS training courses that I run, the question of optimizing the building of the models comes out regularly.
In this post, I detail a way to import profiles across streams available in the form of 3D polylines in HEC RAS to speed up this build process.
The detailed approach here is certainly not the only solution, nor necessarily the optimal approach, but it is based on free and easily accessible tools.
Goal :
Generate HEC RAS .csv file for importing cross sections from 3D polylines representing cross sections of the river.
Pre requisite :
All you need is a file containing 3D polylines (each point is defined by its coordinates X, Y, Z) in format DXF or Shapefile, cleaned, containing only the profiles cross (if the file is in format DWG, save it in DXF ASCII format so that it is easily compatible with QGIS).
You should also have Qgis version 3.xx at a minimum, a spreadsheet (Excel or Calc), and software to process DWG files (Draftsight works well).
Procedure :
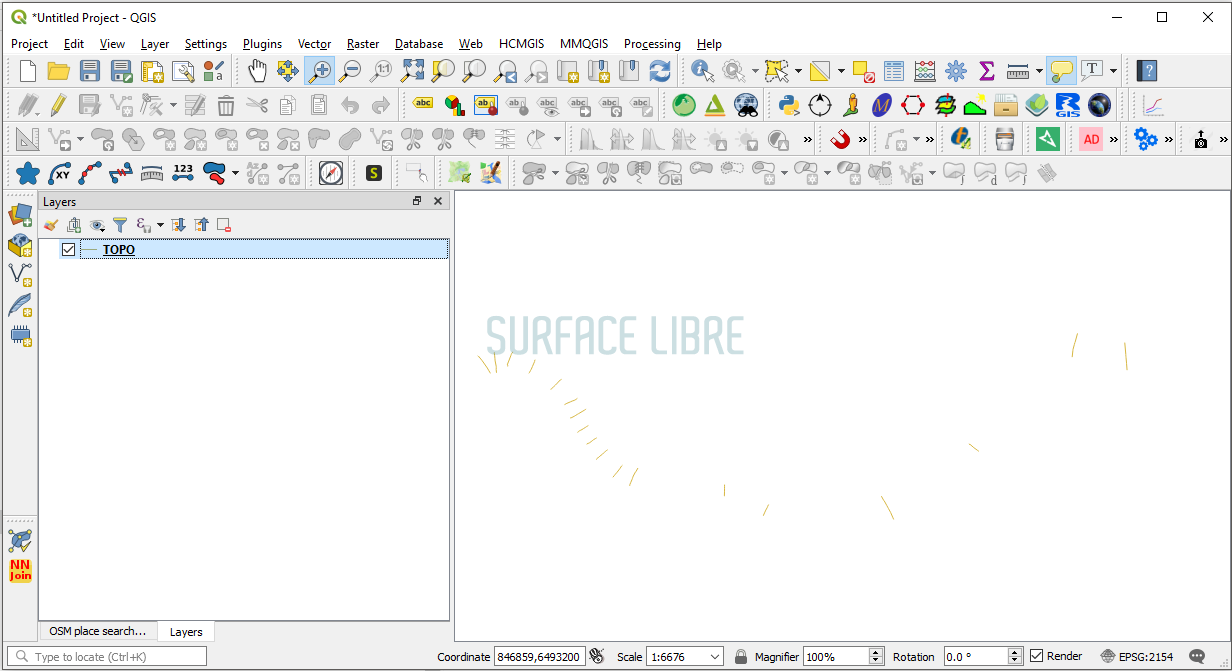
1 - Open the file of lines with QGIS, save it in Shapefile or in memory if necessary to be able to handle it, add a column of attributes corresponding to the station in HEC RAS and complete this attribute (decreasing from upstream to downstream, corresponding to the topological order of river sections across the model).
This step can be done automatically by crossing with a layer of mileage points if available.
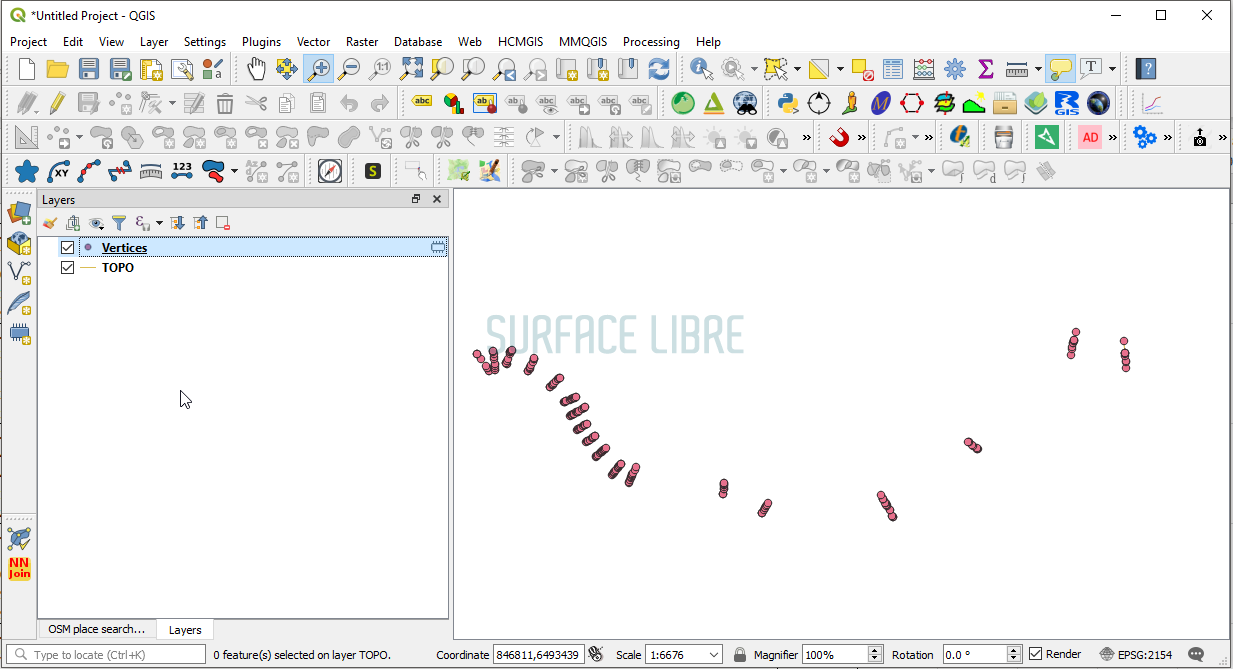
2 - Extract vertex lines, to have a layer of points:
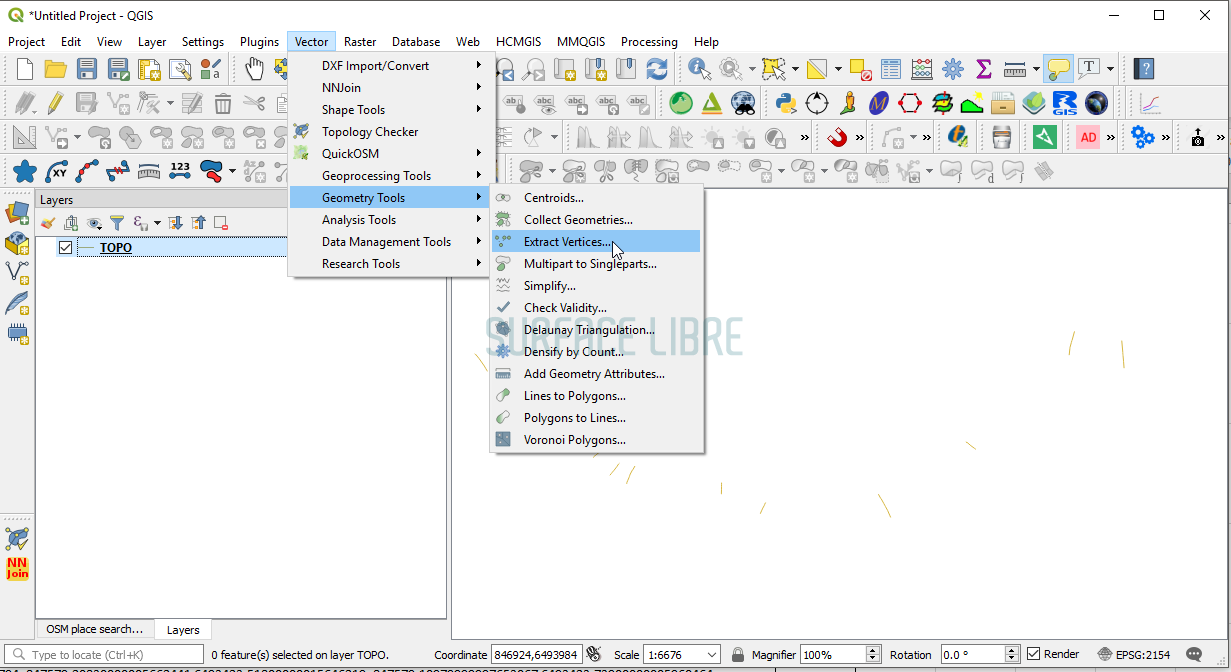
↓
3 - the addition of geometry attributes to the vertex layer (vector / geometry tools / Add geometry attributes) makes it possible to have direct access to the coordinates x, y, z in the attribute table of the point layer, in the latest versions of Qgis (3.xx minimum).
We obtain an attribute table grouping the x, y, z of each point as well as the identifier of the Cross Section to which it belongs.
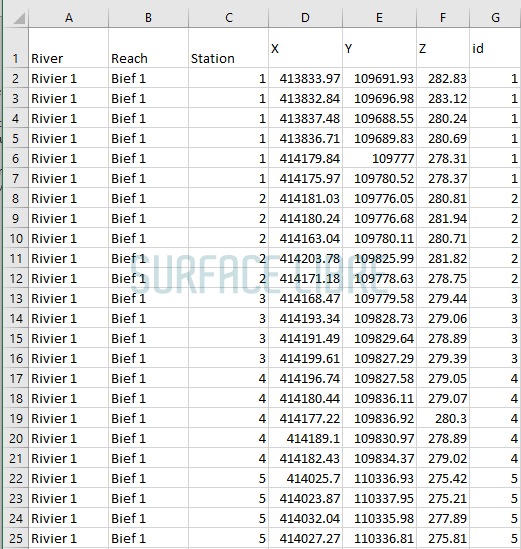
4 - Copy the attributes and format this table to obtain a table similar to the following capture, giving for each point: its coordinates X, Y and Z, the identifier of the profile (Station) resulting from the initial profile layer, and two columns representing the river and the reach (River and Reach).
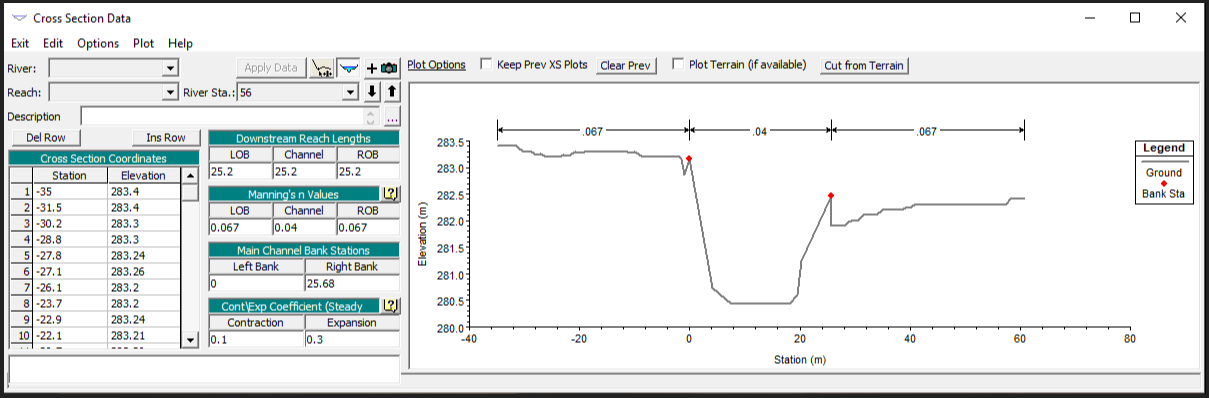
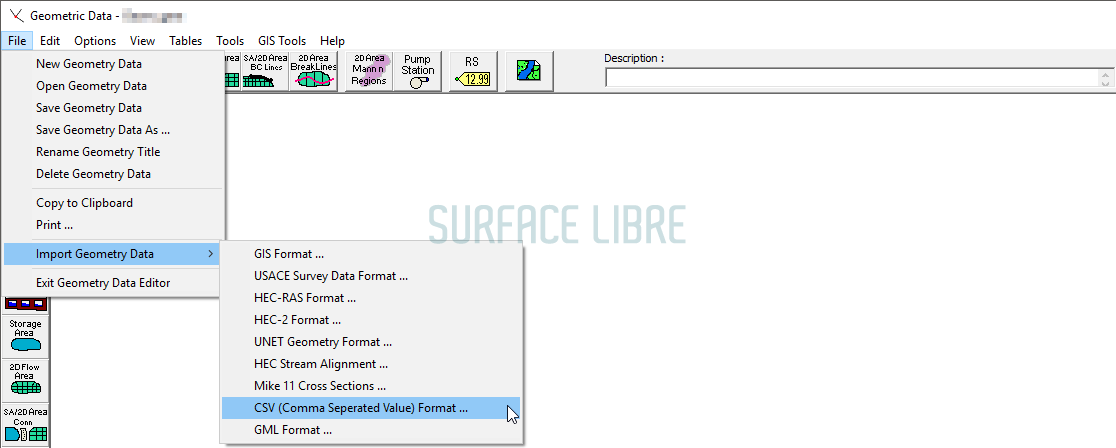
 5 - Import this profile data via the HEC RAS import tool:
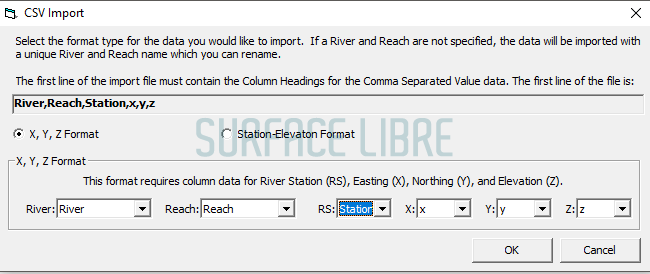
 -> Indicate the corresponding fields:
-> In the import interface that follows, select the appropriate options :
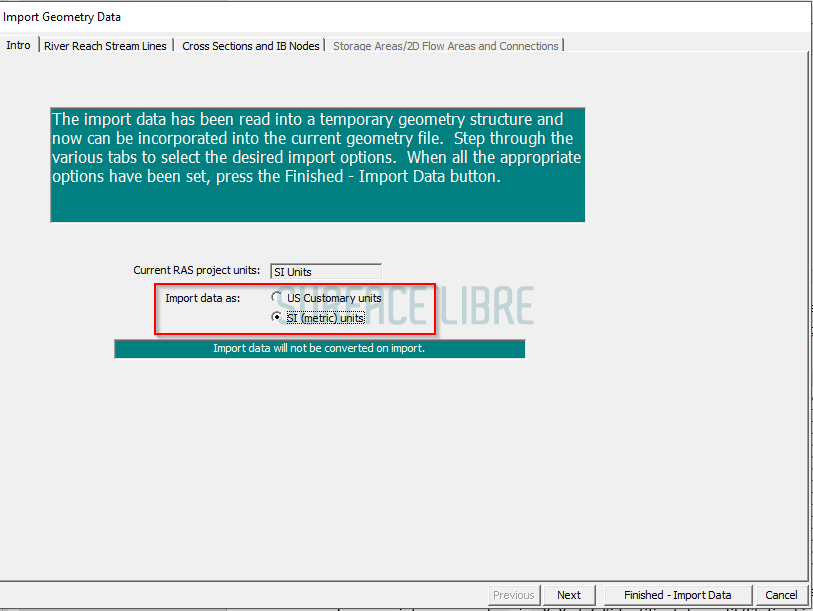
----> the corresponding unit system (SI or US)
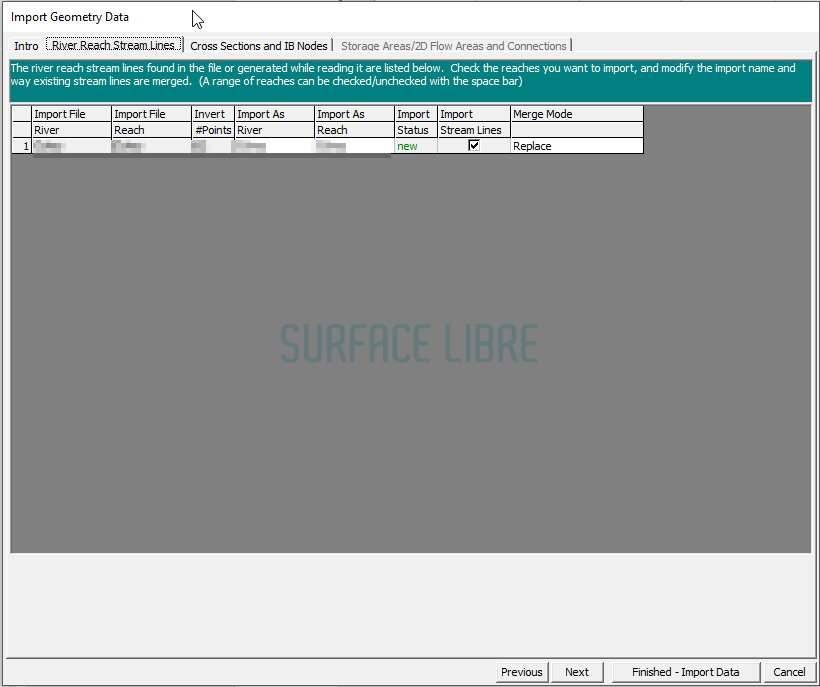
-----> if you create a reach or if you insert profiles in an existing reach
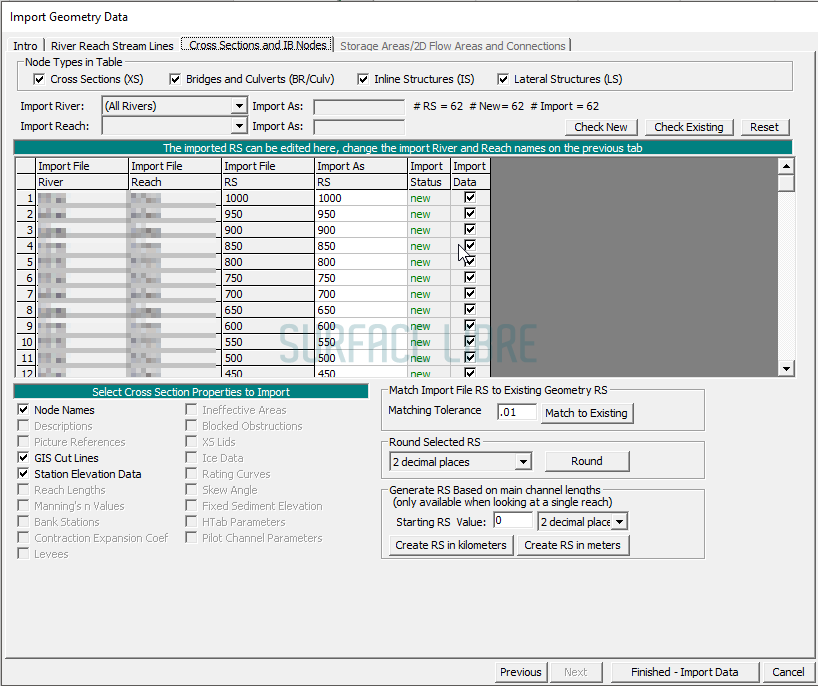
-----> if you create or update the profiles contained in the CSV file.
Et voila.
Note : you can also process directly a point cloud of XYZ points if they are ordered correctly in the cross section and if you have an identifier to group the points into the corresponding cross sections.
And if this tutorial pleased you, do not hesitate :
- To share it
- To return to the blog from time to time, I regularly post similar tutorials, the result of my experiments with various modeling software or my opinion on the evolution of practices on the theme of modeling in environmental hydraulics.
PS: If you want to be informed about new blog articles, you can send me an email via the contact form or find me on twitter @surfacelibre.
